The Alberni Valley News introduces a new monthly column, Shop Talk, by woodworking expert Michael Kampen.
You can purchase lumber that has been dressed on all sides but the cost of this additional processing is reflected in the higher price. Purchasing your lumber as rough 4/4 stock allows the greatest flexibility and the lowest cost but you will require some machinery to prepare it.
When working with solid lumber, success for any project requires stock that is flat, straight and which has the faces, edges and ends are square to each other. Any joinery or gluing up of panels will be dependent on how well you prepared your stock initially and you cannot cover up shortcomings at this stage later in the process.
The machines you use and the order you use them is critical when preparing rough lumber. Remember the acronym FEE: this stands for Face, Edge and Ends.
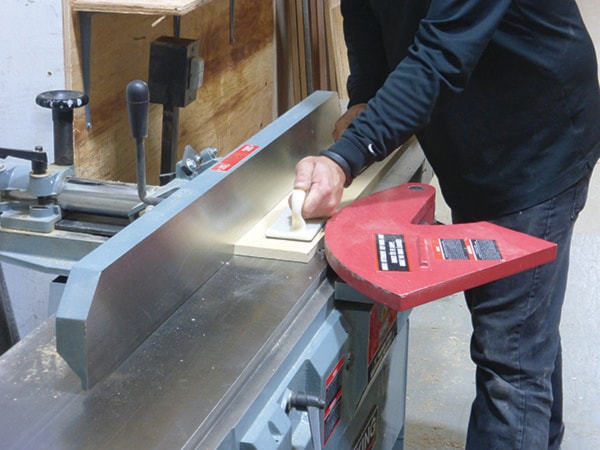
You will need three tools to prepare your rough stock: a jointer, a thickness planer and a table-saw or miter saw. On the jointer, the infeed table is offset from the outfeed table. As the material moves over the knives, any irregularities in the board are milled away, resulting in a flat and smooth surface.
With the first side dressed, move on to the thickness planer. This machine has a single table with the cutter head above the work. Place the smooth surface from the jointer face down on the table and the overhead knives will remove material from the remaining rough side.
When the board emerges, it will be flat and a consistent thickness from one end to the other. Skipping the jointer and moving directly to the thickness planer will result in a board that is smooth but it will not be flat. Using a jointer for both faces will result in a board that is thinner at one end than the other.
Next, confirm your fence is square to the knives on the jointer; we use a simple digital angle gauge to get the setting perfect. Next, with the face of the board pressed firmly against the fence, joint one edge of the board. This provides a surface at a perfect 90 degrees to the two faces.
To prepare the final edge, move back to the thickness planer and run the piece through with the good edge down. This will give you the final edge square to the other two faces and parallel to the first edge, resulting in a board that is of consistent width along its length.
Cut one end of the board, removing any checks that may have formed as the lumber was dried and then cut the other end as required.
When using a miter saw to cut the ends, remember to set up it up carefully. With each cut you are cutting in two different directions, side to side and up and down.
Michael is the resident woodworker and manages the CNC Shop at Westcoast Home Hardware.